SMF June 2019 Challenge - Rimmed Soap

Soapmaking Forum

Help Support Soapmaking Forum:

This site may earn a commission from merchant affiliate links, including eBay, Amazon, and others.
No worries!! It’s been good for me to remember that soaping is my stress RELEASE, not something that contributes. So I’m content to sit back and ooh and ahh over everyone else’s :)

KiwiMoose, I’m crossing my fingers for you!!! I have faith!!
Faith no more @steffamarie! I’ve given up too...
59E37A0B-74F5-4B8A-82CA-085789DB9565.jpeg B8067D02-4D8B-4550-9346-4C9A93B51EAF.jpeg 5CC6387E-D936-4074-94B2-F38234C4C790.jpeg 8FDBD0E0-801F-4384-ADDA-01E5E85B4D89.jpeg 9C7D8606-4400-4BBE-AE83-FB3A19B91019.jpeg

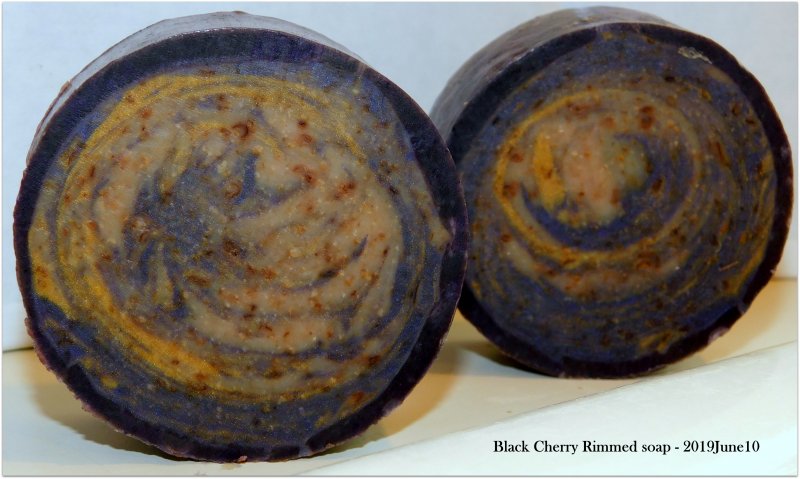
Oh! And the colours were supposed to be black, hot pink, purple, teal and white - so that's another reason to abort this mission. The fragrance was very yellowing - White tea and berries (candle science)
 
Last edited:
Remember that the challenge doesn't require round soap.

That's comes as some sort of comfort. I unmolded my soaps this morning and found that they were not exactly...round. Lol! I used a Pringles can that I cut in half and lined with parchment paper, my rim, added a coupe of layers of parchment paper on the bottom and covered with a plastic bag and filled. When I added my rims, I did my best to fit them to the molds, but it seems that I could have done a better job. I think there was a gap at the bottom of my mold where the rim was uneven and didn't sit flush.

When I poured the inner batter, it seeped out of the bottom and filled in the gap between the rim and the mold. After unmolding and cutting it this morning, I was able to peel off the inner batter that had seeped onto the rim. And, it is definitely NOT round! Round-ish? Sure.
 
If the inner soap is made, and removed from the mold, then the rim can be gelled and while it's still warm can be wrapped around the inner. Do you think they won't bond if done that way?

Having done something similar to this, I doubt the two layers will reliably bond under these conditions.

But I read somewhere recently about a technique where the soap maker makes two entirely different batches of soap, firmly presses layers of the soap together, and bakes them at a sufficiently high enough temp so they do bond together.

update -- Found the method. It's a "soap welding" technique shared by "From Grace to You" in her free e-book http://www.fromgracetoyou.com/creatingsoapart/ebook.pdf Here is an excerpt that summarizes the welding technique --

"...Welding soap puzzle pieces together is possible as long as you have a secure, even connection
between the pieces. ... After cutting the soap and fitting it together, a thin layer of water is rubbed on the slices of soap. Then they are pressed securely together and placed in a mold to hold them in the oven. The oven should be preheated to 200 deg F and the soaps placed in the oven for about 10-20 min. Next, take them out of the oven and let them cool completely. I like to put mine in the freezer to speed cooling. Finally, plane and bevel the soaps then let them cure as usual...."
 
Last edited:
That's comes as some sort of comfort. I unmolded my soaps this morning and found that they were not exactly...round. Lol! I used a Pringles can that I cut in half and lined with parchment paper, my rim, added a coupe of layers of parchment paper on the bottom and covered with a plastic bag and filled. When I added my rims, I did my best to fit them to the molds, but it seems that I could have done a better job. I think there was a gap at the bottom of my mold where the rim was uneven and didn't sit flush.

When I poured the inner batter, it seeped out of the bottom and filled in the gap between the rim and the mold. After unmolding and cutting it this morning, I was able to peel off the inner batter that had seeped onto the rim. And, it is definitely NOT round! Round-ish? Sure.

I've had that seepage, particularly when I pounded the heart-shaped rimmed soaps while the center was still wet, but also with one of my round ones, too.
 
Ooh - here's an idea, Why not make the inner part of the soap first? Let it set as usual. THEN make the rim and put it around the exterior of the soap AFTER. Is that a thing? It would be easier to work with that way wouldn't it?
This video popped up on my YouTube feed. It looks like this guy had a similar idea.

 
I'm pretty excited about how mine turned out- I decided to try to do it using soap dough, which was not without its pitfalls, the design I rolled together tried to fall apart in a couple of places, getting the stuff ti stick to itself but not the mat is a challenge.
 
I'm going to be trying soon - I just have to figure out the timing issues. I think I'm going to make a slab and try cutting a rim layer using a cake leveler. In theory it should work as long as the soap is at the right texture.
 
HowieRoll, has the tackiness diminished? I noticed that the added glycerin rim and the high Castor Oil rim were both softer to touch for a few days longer than most of my soaps exposed to the air. But after a few days, they seemed to feel normal.

I put a plastic wrap over the top of my soap mold after inserting the rim, so it wouldn't dry out overnight. That seemed to work for a day or two just fine. The extra glycerin doesn't really seem to dry out fast, but like you, I didn't want it to dry out too soon.

Have you made the new attempt yet? I wonder if the tackiness was a combination of the SF + glycerin. I'd reduce the SF to 3%, or the glycerin to maybe 1 - 1.5%. Just a guesstimate.

Yes, the tackiness has diminished! It still has some "texture" on the rim from when it was tacky and then handled, but there wasn't much I could do about it. There was also a bit of soda ash. And stearic spots. And issues with cutting the soap straight. *sigh* Here is a photo:

Rimmed Soap June 2019 6.jpg


I made a second batch with the exact same recipe but lowered the SF to 4%. However, that batch devolved into a crumbling, cracking mess that wound up at the bottom of my trash can.

Next, I made another recipe back at an 8% SF and it turned out great and not quite as tacky as the first one. The only difference was the first one I added a few different oxides that had been mixed in oil (so there was a very small amount of additional oil added), and the second successful one I colored using only AC powder added directly to the soap batter. I cut it today, and aside from my straight cutting issues and stearic spots again, I think it will be my entry. Phew!
 
Dude. That's an entry right there. I see no failure.

My first and only attempt at making a rim is waiting to be forced into the pvc pipe. I got lucky and spotted a cardboard box that my hubby was about to take to recycling. "Stop! Let me measure that!" Perfect size. I'm afraid it is going to be an utter failure, my recipe moved quite quickly, so instead of gorgeous lines with a Taiwan Swirl, I had plop and pull a stick through it like that's what I meant to do the whole time. Really hoping it won't be too hard to bend into the PVC without cracking... but breaking things is my area of expertise (ask my husband) so I'm not expecting a miracle. I went with a higher liquid oil ratio than I normally use, plus 10% castor oil, plus I added honey (maybe why it moved a bit fast on me, duh) as usually my honey soaps without stearic acid tend to be quite soft for days, so hoping this helps the flexibility. I poured it at roughly 1/8" thick, so hoping that will be thin enough and I don't have to shave it down. I found a cake leveler while shopping that might work for that.
upload_2019-6-17_14-55-49.png

It's adjustable down to 1/8", so I might run it over the sheet just to make sure it's all level. This will be my only attempt for the challenge as I'm a bit chaotically swamped, and hubby just threw in a getaway next week while daughter is at camp.
 
I thought I'd try the soap welding technique that Grace demonstrates in her video titled Making Geometric Cold Process Soap using Soap Welding-Chapeter 10 Section 2 Creating Soap Art. Not with a rimmed soap, but with a bar I cut apart and put back together again. It seems to be sticking really well, so it seems it could work with a rimmed soap, too. How well it would last with ongoing use, remains to be seen, but Grace responded to an inquiry about that in the comments section of the video and at that time, the bonds were holding in use. I was able to plane & bevel the soap without any difficulty whatsoever. I can barely see the location of the bonds; sort of like a tiny little scar where the pieces meet.

So I think it would work for KiwiMoose's idea. Thank you to DeeAnna for pointing that out.

Edit: Here is what it looks like after soap welding, planing & beveling:
full


The welds are easier to see with close-up flash photography than by the naked eye - at least in my kitchen lighting and my naked eye. My husband also had trouble finding both 'welds'.
 
Last edited:
Well, I made my first and only attempt for the challenge. @earlene some of my rims have cracking around the rim, but as far as I can tell the crack is not all the way through. In my mind, this is not an acceptable entry - do you agree?

I am totally ok with not having an entry and will share my fail (it's rather humorous) on the entry thread. I enjoyed taking a second stab at this method (I tried once in 2016), but it won't be added to my list of techniques that I MUST perfect. :D

No, I don't agree. Cracked rims do not disqualify the soap for entry.

If it's perfection you're after, it also depends on how it looks as a finished soap, right? Can you smooth out some of the cracks? Perhaps the scraping I demonstrated in the video with the curved palette knife would remedy the situation for you? In fact if the bars are already cut, you don't need a curved tool. A straight edge of a palette knife or even a potato peeler with a light touch, would do nicely.

I say give it a try if you if you are willing.

My Alkanet colored rim didn't look as good as I was hoping so I scraped some of it and it looks better, in my opinion. Not the best, but better. If you look closely, you can see where I tried to patch some areas and the inner soap seeped through.
full


I certainly don't want people to feel that it has to be perfect in order to enter. If that is what folks are getting, I am truly sorry for setting such expectations!
 
Ooooh! @earlene you just gives me an idear! I wonder if I have a biscuit cutter the right size that it would plane the outer rim without removing all of the rim... hmmmm.... I did end up with an outer rim that was thicker than planned - I calculated for 1/8" pour but the rims are measuring closer to 1/4". (I blame the pourer not the calculator, the outer edges of the flat rim were slightly less than 1/8" along all sides.) Then the next question would be if I risk damaging the rim by doing that. It's still a soft soap so might be ok. I'll keep ya updated!
 
Reminder:

The Entry thread will open on June 22, 2019 in about 13 hours from now!
Remember to limit posts on the entry thread to entries only, please. Of course the person making the entry may add narrative to the entry post to give any information about the soap and their process. That is always welcome.

Comments and questions about specific entries may be made here on this thread, of course!

· After the closing date June 26, 2019 at 11:59 pm CST the winning entry will be chosen using survey monkey (Voting will be open from June 27, 2019 through June 29, 2019) and the winner announced on June 30, 2019. There is no prize attached to this challenge.
 
Ooooh! @earlene you just gives me an idear! I wonder if I have a biscuit cutter the right size that it would plane the outer rim without removing all of the rim... hmmmm.... I did end up with an outer rim that was thicker than planned - I calculated for 1/8" pour but the rims are measuring closer to 1/4". (I blame the pourer not the calculator, the outer edges of the flat rim were slightly less than 1/8" along all sides.) Then the next question would be if I risk damaging the rim by doing that. It's still a soft soap so might be ok. I'll keep ya updated!

My rims are a bit thick but i dont think there was a set thinness. just that it follows the rim process.
 
No, there wasn't a set thinness. I was just saying that if I wanted to remove the cracking that I have on the outer layer of the rim (the cracking doesn't go all the way through) that I could use a biscuit cutter to reduce the thickness of my outer rim and essentially plane my outer rim more consistently. The original problem discussed in post #73.

Update to planing with a biscuit cutter: Sadly my biscuit cutters are 3" and 2-3/4", which put them perfectly inside/outside the rim, so that idea won't work.
 
You are correct, msunnerstood! No set thickness, either. ;)

I am sorry that idea didn't pan out, amd. It certainly was a good idea, though! Guess what I'll be looking for at the Goodwill next time I go. :oops: It seems I just can't pass up a new idea and the tools to make it happen. I really need to restrain myself!
 
Back
Top